Azure fileshare for WVD with Fslogix
Setting up an Azure Storage is not a complex task. But when we want to use it for Windows Virtual Desktop and we need to integrate it with a local active directory, it is quite complex. I had a workshop this week with a customer and I realized how hard it was to share knowledge and explain how it should be setup. So I felt that another guide was needed on the subject.
With fslogix you save user profiles as vhdx disk images on a fileshare. It can be almost any fileshare, but it needs to be able to manage the speed and be high available. And in a modern cloud computing you shouldn´t even consider using a fileserver. The Azure storage is the absolute best option.
Step 1 : Create a Storage account in Azure
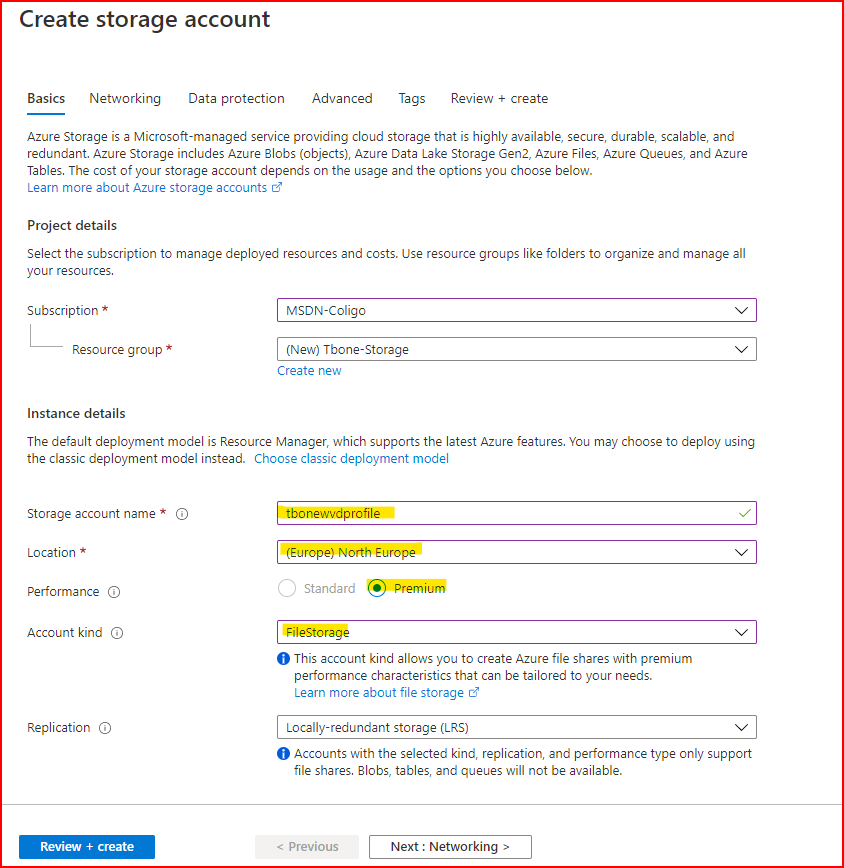
Open up the Azure portal and create a new Azure Storage Account

Keep the Storage account name short if possible due to the netbios name limit (16char) in local active directory.
Place the storage in the same region as your WVD´s
Select Premium and Filestorage
A good way of limiting and securing the access to the storage is to select private endpoint or public endpoint (selected networks). Then the storage is only available from the private networks selected. The Private endpoint will add a small cost.
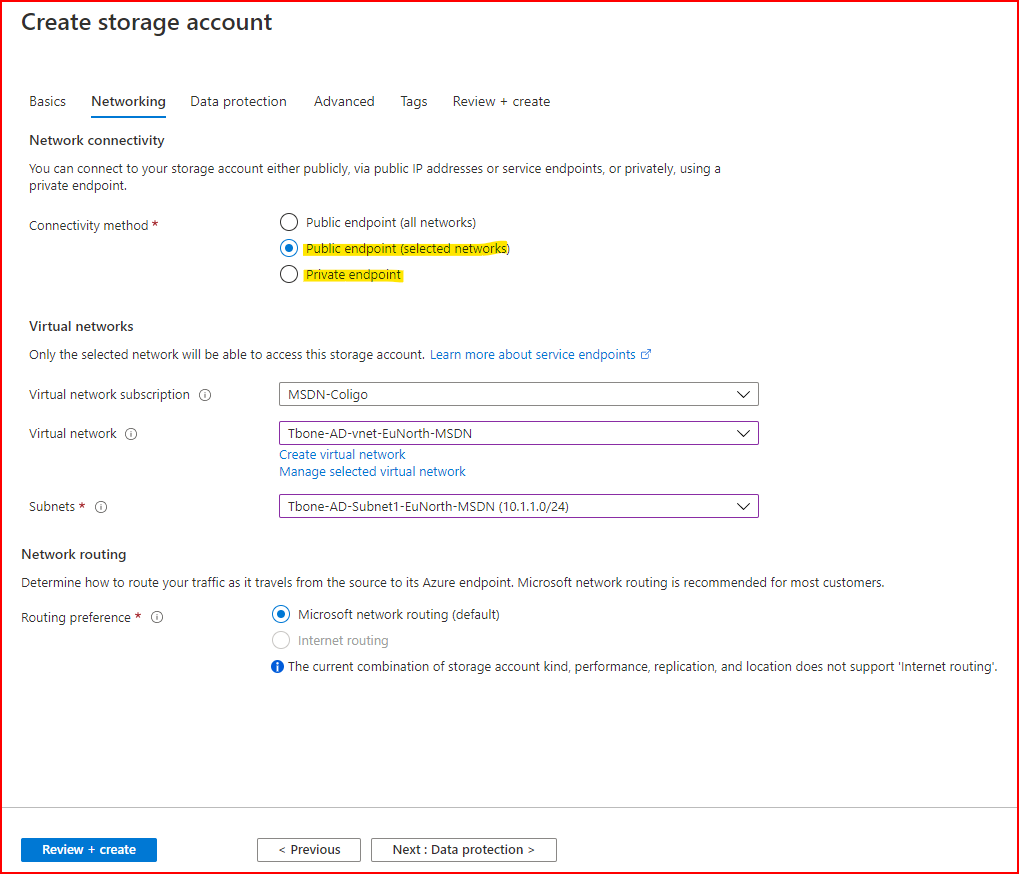
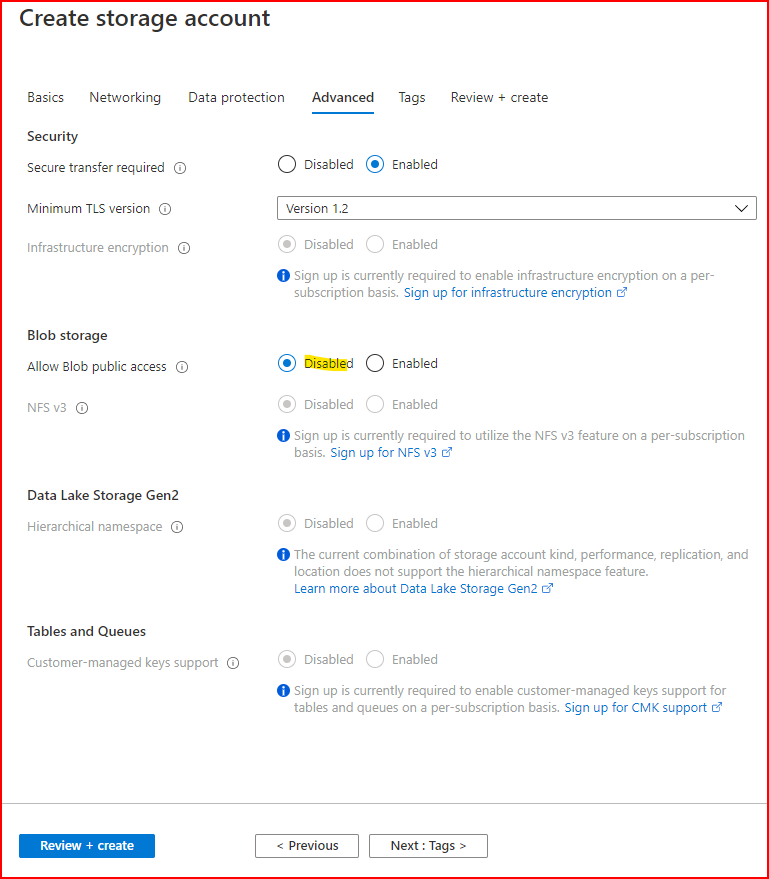
Finally, limit the public anonumous access of the storage
You can now go ahead and create your Azure storage
Step 2 : Create a File Share
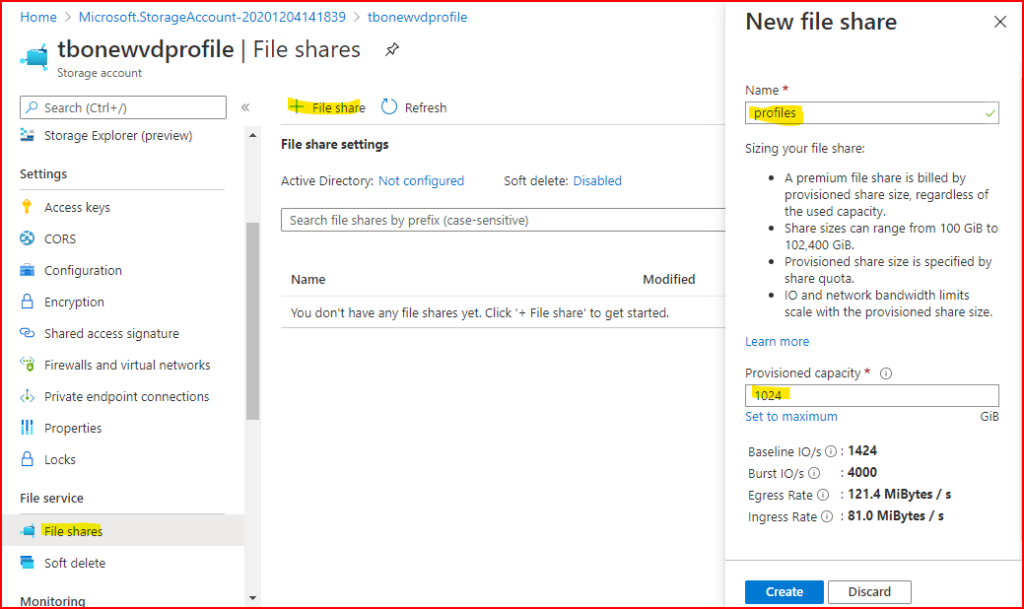
Open your Azure storage and select file shares node.
Select to create a new File share
Name and select a size for your share. When using Premium file shares, you will be billed for the complete size. also note that the bigger the more IOPS.
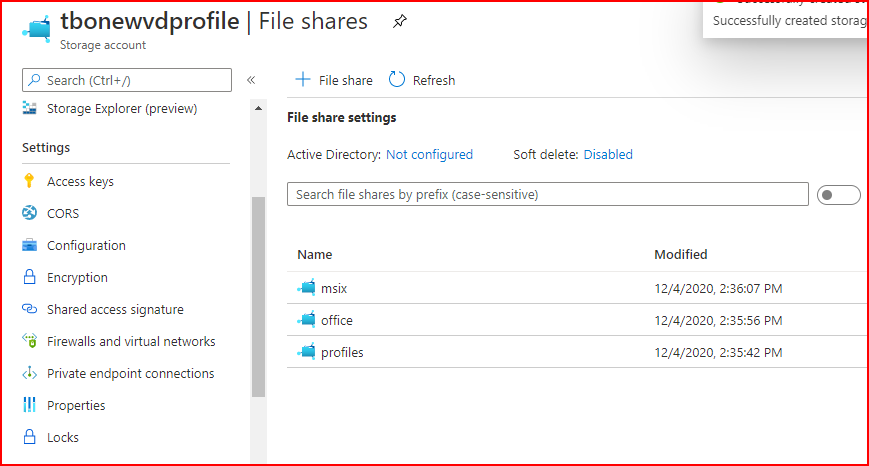
Go ahead and create the fileshare. You can create multiple shares if you want to seperate profile and office containers. And also one for upcomming MSIX packages.
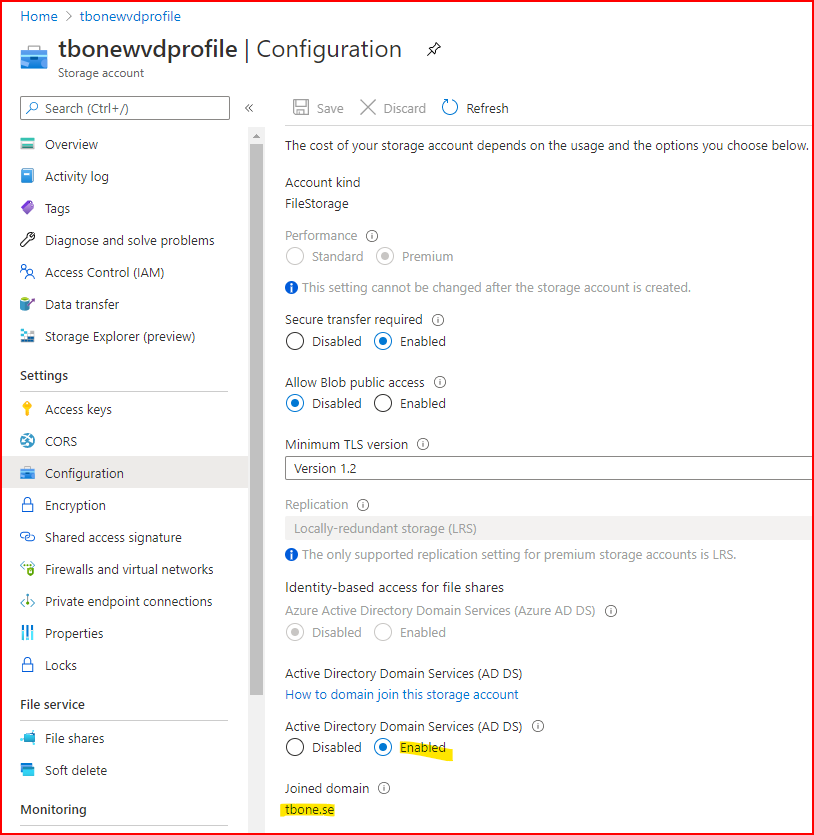
Step 3 : Enable Active Directory authentication on the Storage account
Then we have the tricky part, joining the storage account as a server object in our local active directory. This will enable kerberos access control towards the shares.
The simple way is to logon to a domain controller and run the powershell commands. Otherwise you will also need to install ADDS powershell in server components.
You must also download ane extract AzFilesHybrid PowerShell module from here
Start an elevated PowerShell prompt and change directory to the folder where you extracted the AzFilesHybrid and run the following commands:
Set-ExecutionPolicy -ExecutionPolicy Unrestricted -Scope CurrentUser
install-module AZ
Import-Module -Name c:\temp\azfileshybrid\AzFilesHybrid.psd1
Connect-AzAccount
Login to Azure and verify that you are connected to correct subscription. If not change with:
Select-AzSubscription -SubscriptionName "<your subscription name>"Then connect your Azure storage to local AD by this command:
join-AzStorageaccountForAuth -ResourceGroupName "<Resource Group Name>" -Name "<Storage Account Name>" -DomainAccountType "ComputerAccount" -OrganizationalUnitDistinguishedName "<OU Distinguished Name>"In my case it looks like this:
join-AzStorageaccountForAuth -ResourceGroupName "Tbone-Storage" -Name "tbonewvdprofile" -DomainAccountType "ComputerAccount" -OrganizationalUnitDistinguishedName "OU=Servers,DC=Tbone,DC=se"
Make sure your storage computer object is created in the OU selected.
It can take some time before the storage account is updated with the connection to your on-prem AD.
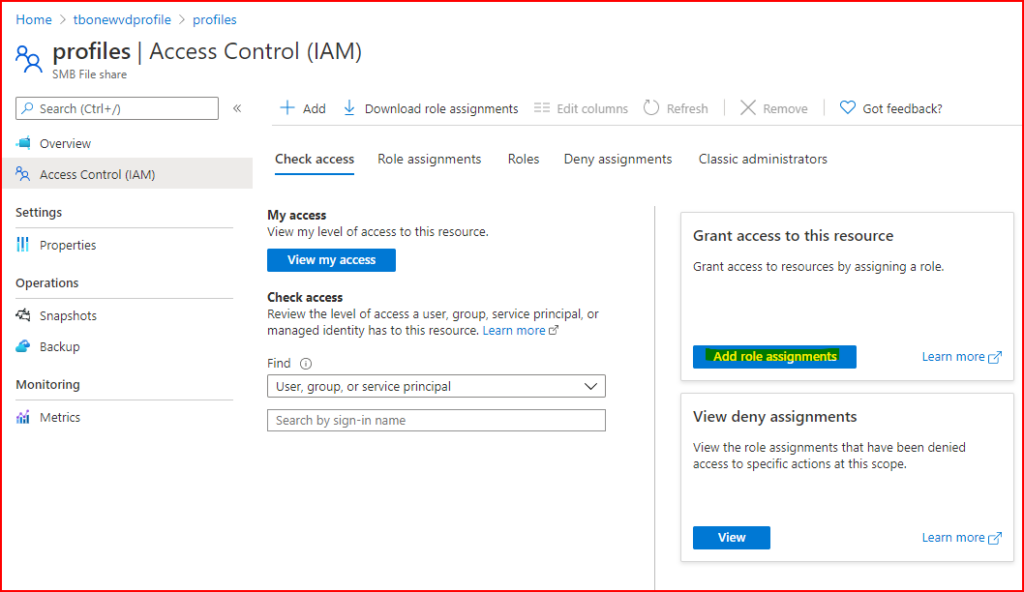
Step 4 : Configure share folder permissions
On a normal fileserver, when sharing a folder you can set the shared folder permissions. In Azure you need to add these permissions on the fileshare with Storage account Access control (IAM)
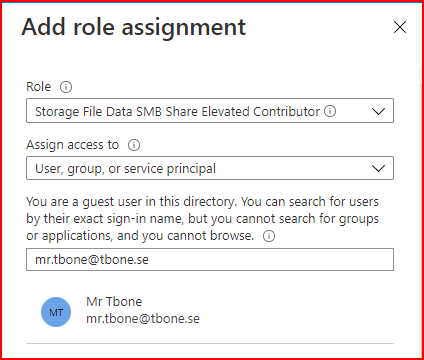
Add a new role assignment on the file share
The shared folder admins will need Storage File Data SMB Elevated Contributor rights
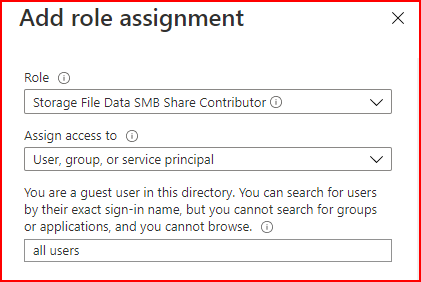
But don´t forget, the end users will need Storage File SMB Share Contributor rights
Final task: Set the NTFS permissions
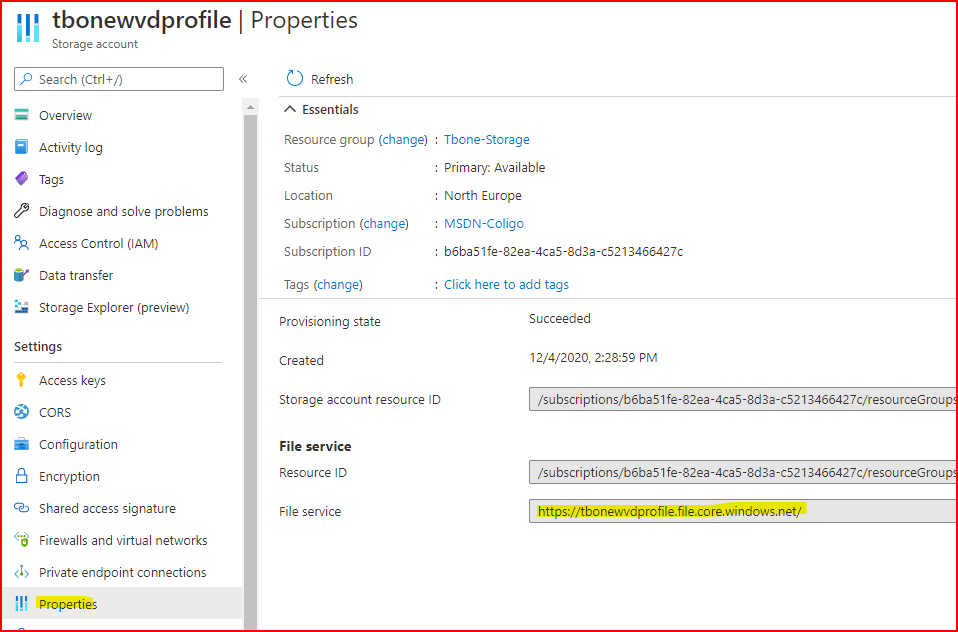
You can get the servername under properties for the storage account:
Logon to a workstation with credentials that has been granted the Storage File Data SMB Elevated Contributor role in previous step. The workstation must also have access to the selected network in step 1. (private or public endpoint selected networks)
Open the share in explorer \\tbonewvdprofile.file.core.windows.net\profiles
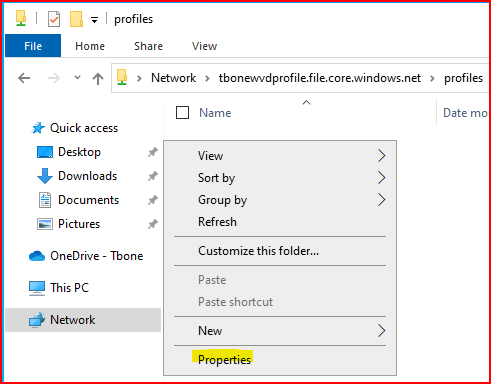
Rightclick and select Properties for the share.
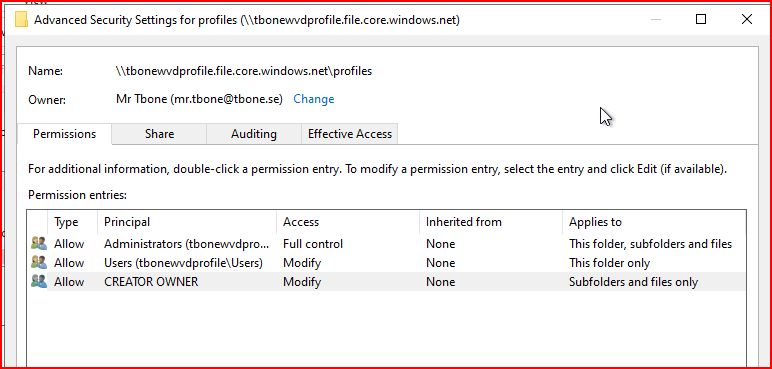
Open the security tab and select Advanced
Set at least the minimum permissions for fslogix:
| Users | This Folder Only | Modify |
| Creator / Owner | Subfolders and Files Only | Modify |
| Administrator (optional) | This Folder, Subfolders, and Files | Full Control |
The share is now ready for profiles from fslogix!