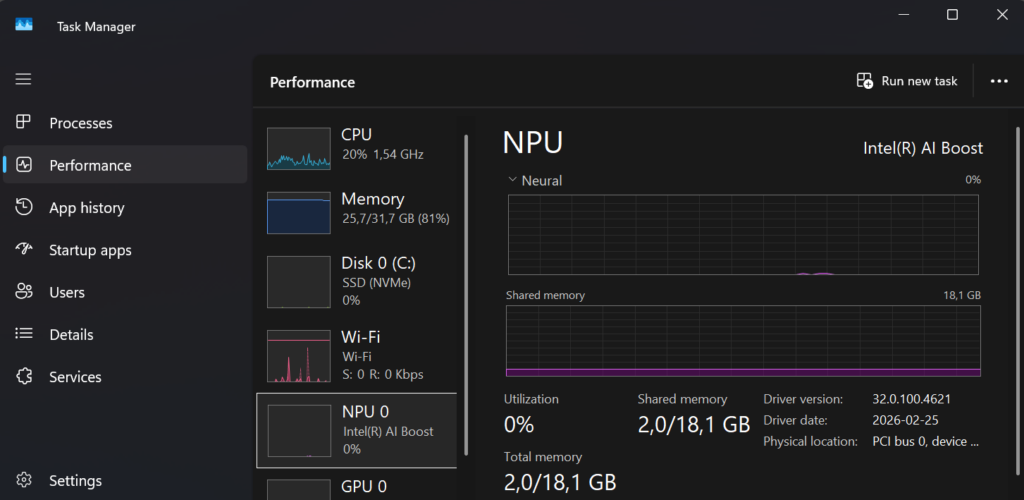
My NPU was mostly idle until I realized I could use it for real work by building an app myself

I attended MVP summit this week and was challenged to checkout a blog on Vibe coding for the MPU. My Intel-based Surface Laptop 7 has a separate chip called an NPU (Neural Processing Unit). Think of it as a small “AI engine” built to handle things like speech, image, and text AI tasks using less power than the CPU or GPU.
This also make my laptop a Copilot+ PC! This is Microsoft’s label for Windows laptops that have the right hardware to run certain AI features on the device. The nice part is the NPU doesn’t do much unless something actually needs it, so when you’re not using those built-in AI features (or an app that targets the NPU), it’s mostly just sitting there idle.
I’ve been doing Intune, Entra ID, and modern workplace work long enough to know one thing, most troubleshooting is not about one log, it’s about correlating many different signals. That’s exactly why local AI on the endpoint suddenly feels practical. So lets try it out and make my first Vibe app that uses the local NPU for troubleshooting.
What is a local NPU and why it matters
Copilot+ PCs include a dedicated NPU designed to run AI workloads efficiently using significantly less power than CPU or GPU. This enables:
- Very low latency AI responses
- Offline / airplane‑mode scenarios
- No per‑token costs for routine AI workloads
- Improved privacy and data ownership
- Better battery life and thermals
What is vibe coding
Vibe coding is AI‑augmented development. You describe what you want in natural language, an AI coding assistant writes the code, you run it, see what breaks, and iterate. You act as architect and the requirements analyst.
This works extremely well for NPU development because local runtimes now expose OpenAI‑compatible endpoints, and coding assistants already understand those SDK patterns.
Setting up the platform for vibe coding with a local NPU
Before you write a single line of code, you need the right platform in place. Vibe coding, using AI-assisted tooling to explore, prototype, and iterate quickly, works best when your editor, AI runtime, and development stack are all aligned. In my case, the goal was simple: build an app that can run AI models locally and take advantage of on-device acceleration like the NPU.
Here’s the setup I used:
1. Code editor + AI coding assistant
At the core of the workflow is Visual Studio Code together with an AI coding assistant.
- Visual Studio Code is the main editor where everything happens like code, debugging, terminal, and Git.
- GitHub Copilot provides the “vibe” part of vibe coding, suggesting code, refactoring, and helping explore ideas as you build.
Install VS Code and GitHub Copilot CLI using Winget:
winget install --id Microsoft.VisualStudioCode -e
winget install --id GitHub.Copilot -e
This gives you AI assistance both in the editor and directly in the terminal, which is surprisingly useful during early experimentation.
2. Local AI runtime (on-device inference)
To run AI models locally, without relying on cloud APIs, you need a local AI runtime. I’m using Microsoft Foundry Local, which can automatically select the best available hardware on your device (CPU, GPU, or NPU).
Install Foundry Local:
winget install --id Microsoft.FoundryLocal -e After installation, verify that everything works:
foundry --version Then run a model once to trigger downloads and hardware detection:
foundry model run phi-3.5-mini If your device supports it (and you’re on Windows 11 24H2 or later), Foundry Local will automatically use NPU acceleration when available, no code changes required.
3. Programming runtime and libraries
For app development, I went with Python. It’s simple, flexible, and works very well with OpenAI‑compatible APIs, which Foundry Local exposes for on-device models. I also added PySide6. With PySide6, your UI is a native window that launches instantly
Create a virtual environment and install the required packages in Terminal:
python -m venv .venv

.\.venv\Scripts\activate.bat

pip install foundry-local-sdk openai flask requests

pip install PySide6
This gives you:
- foundry-local-sdk – control and bootstrap Foundry Local from your app
- openai – an OpenAI‑compatible client to call local models
- Flask – a lightweight web framework for quick app experiments
- requests – useful for simple HTTP interactions
At this point, you have everything you need to build a local AI-powered app.
4. Git + terminal (optional)
Vibe coding is iterative by nature. You’ll try things, delete things, and refactor constantly. Having Git and a proper terminal workflow is essential. Most of this comes built into VS Code, but make sure you’re comfortable with:
- Creating new repos
- Running and restarting apps quickly
- Switching branches when ideas diverge
The tighter your feedback loop, the more effective vibe coding becomes.
winget install --id Git.Git -e

winget install --id Microsoft.WindowsTerminal -e
That’s it you are now platform ready
With this setup in place, you now have:
- An AI-assisted editor
- A local AI runtime
- On-device inference (GPU / NPU where supported)
- A lightweight app framework
From here, you can start experimenting, build a tiny Flask app, wire it to a local model, and see what happens when your NPU finally stops being idle.
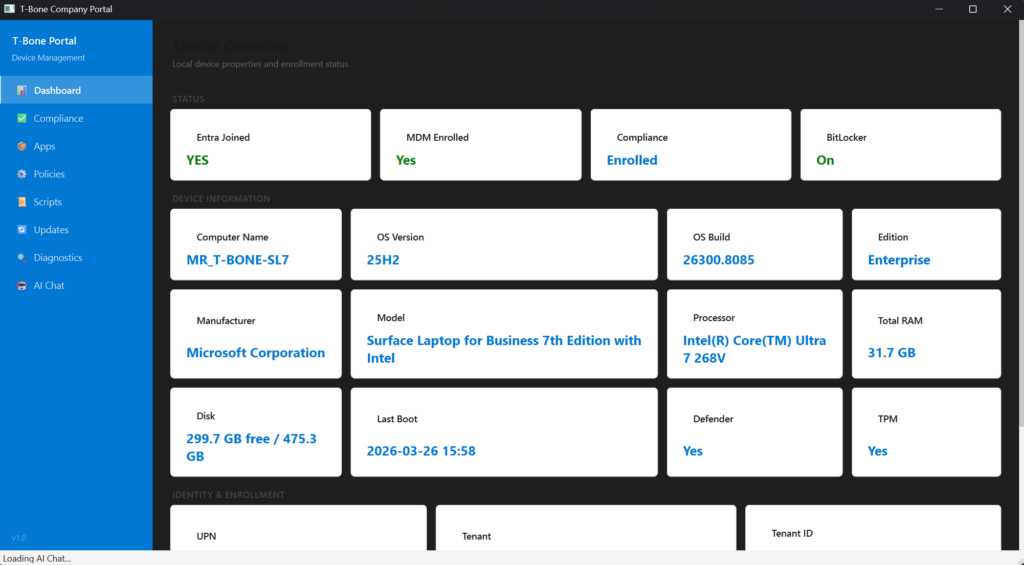
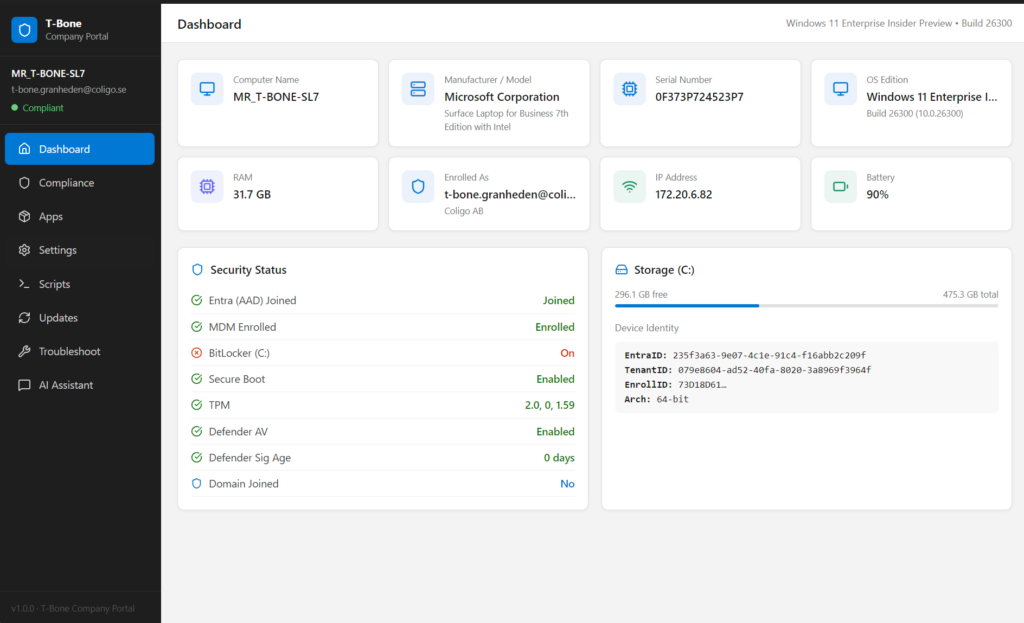
The idea: T‑Bone Company Portal
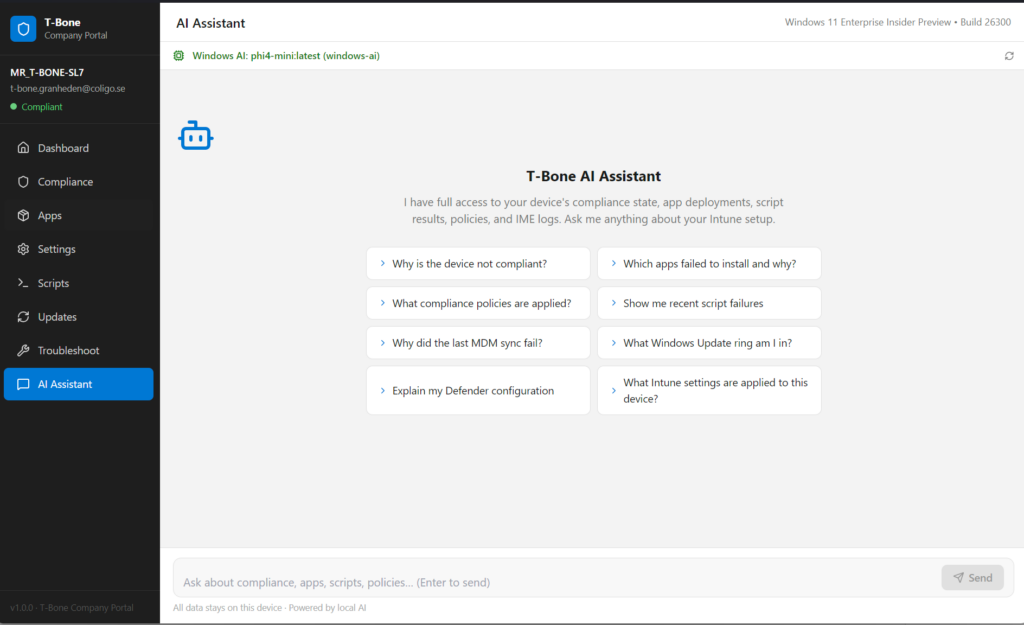
I figured I try to build a Company Portal for Intune, but with more information and most importantly some simple troubleshooting with natural language, executed on the NPU without any sharing of data outside of the device.
To start your new Vibe coding environment you startup the terminal and run copilot. You can run copilot in YOLO mode. where you give AI full access to do what ever it wants. A bit dangerous but also creative.
Copilot
# OR
Copilot --yolo
Then you ask your assistant to build code for you, my prompt was this:
Lets create a “T-Bone Company Portal” as a replacement for Intune company portal. It should show a first dashboard with local device properties like windows version, entra joined, compliance, etc. Then build a similar layout as the “Intune company portal”. But the first tab should show compliance and the comploiance policies applied. Next tab with apps, and this should show both published apps and installed apps. It should be visable if the app is deployed from intune or locally installed. Next tab shows all settings deployed from intune and as much info as possible on all policies. Try to get the name of the policy it comes from. next tab shows scripts, platform scripts and remediation scripts. next tab show update policies deployed.Next tab show links and info in troubleshooting tools and logs that could be interesting from a t-shoot perspective. Last tab is a chat that use only local NPU and has skills to answer questions on all intune related info. the chat should be able to answer t-shooting questions, like why is the device not compliant, why did the adobe app fail to install, etc. Use Registry, eventlog, company portal database, device enroller, sidecar, intune management engine, and more to get all the info. also make all that available for the chat to have skills to answer questions that t-shoot and use all those sources.
Important note: this uses supported APIs and device diagnostics (Graph, MSAL, logs). It does not reuse or reverse‑engineer Company Portal authentication or tokens.
My first vibe app that uses the local NPU for complex troubleshooting
The result was quite stunning, so fast to build and so useful app:
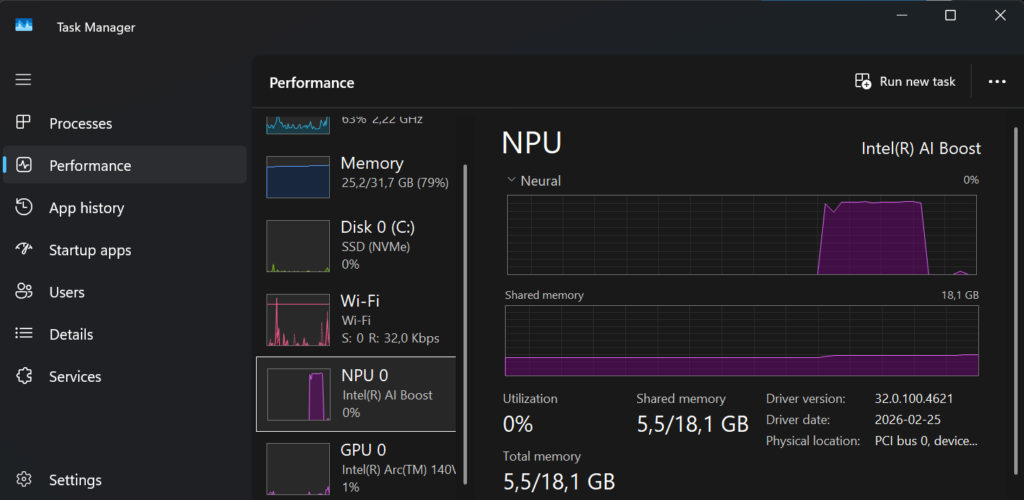
And I can use the local NPU for troubleshooting local Intune related problems:
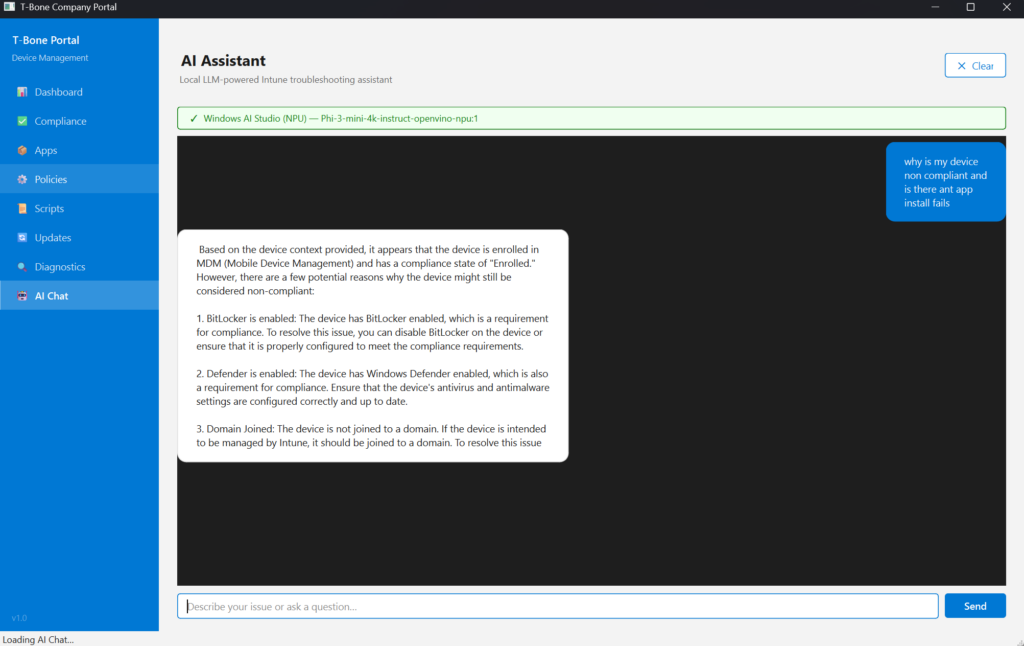
And the NPU is used when we troubleshoot Intune related issues on the device:
I decided to discuss and add some more requirements, so I decided to use some more developer tools and runtimes. So we (me and my copilot) came up with this app built on Vite + React + TypeScript witch is a modern web app stack used to build fast, interactive user interfaces that run in a web browser.
- Vite = how you develop and build the app efficiently
- React = how you build the UI
- TypeScript = how you write safer, more structured code
Much better GUI design. and some enhancements on the troubleshooting node:
Conclusion
Trying vibe coding for the first time was honestly eye‑opening. In less than an hour, I went from an idea to a working application that not only looked good, but also felt right to use, responsive, clean, and purposeful. Even more interesting, the app wasn’t calling out to the cloud or hiding complexity behind APIs. It was running entirely locally, using on‑device AI accelerated by the NPU.
This experiment also changed how I think about local AI. When inference happens on the device, latency drops, privacy improves, and experimentation becomes cheaper, not just financially, but mentally. You’re free to try things. To throw code away. To ask “what if?” without committing to an architecture upfront.
Vibe coding won’t replace careful design or long‑term engineering decisions. But as a way to prototype, learn, and unlock creativity, it’s incredibly powerful, especially when paired with modern hardware like NPUs that would otherwise sit idle.
This was just my first attempt, but it already proved one thing: With the right stack and the right mindset, building something useful, beautiful, and locally intelligent no longer takes days, sometimes, it barely takes an hour. And that’s a pretty exciting place to be.